
Company VPN Activation Guide (UniFi Identity)
This guide covers how VPN access is set up for Park Street employees using UniFi Identity — first the internal IT setup, then the steps the employee follows to activate VPN on their device.
Part 1: IT Setup (Internal IT Team Only)
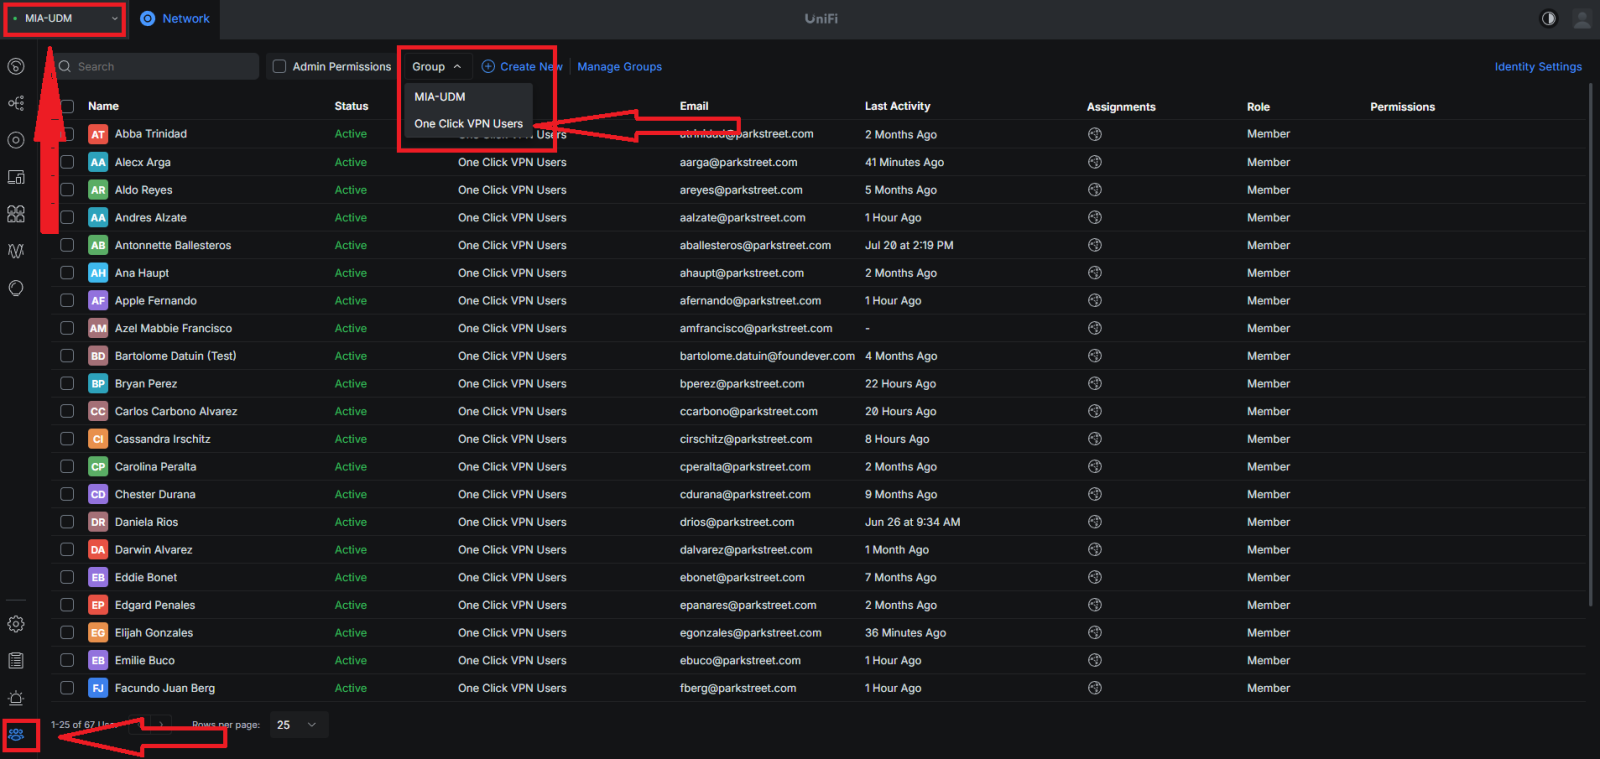
Step 1 — Locate the VPN User Group
In the UniFi Network console for the MIA-UDM site, go to the Users section and use the Group dropdown to view the "One Click VPN Users" group.
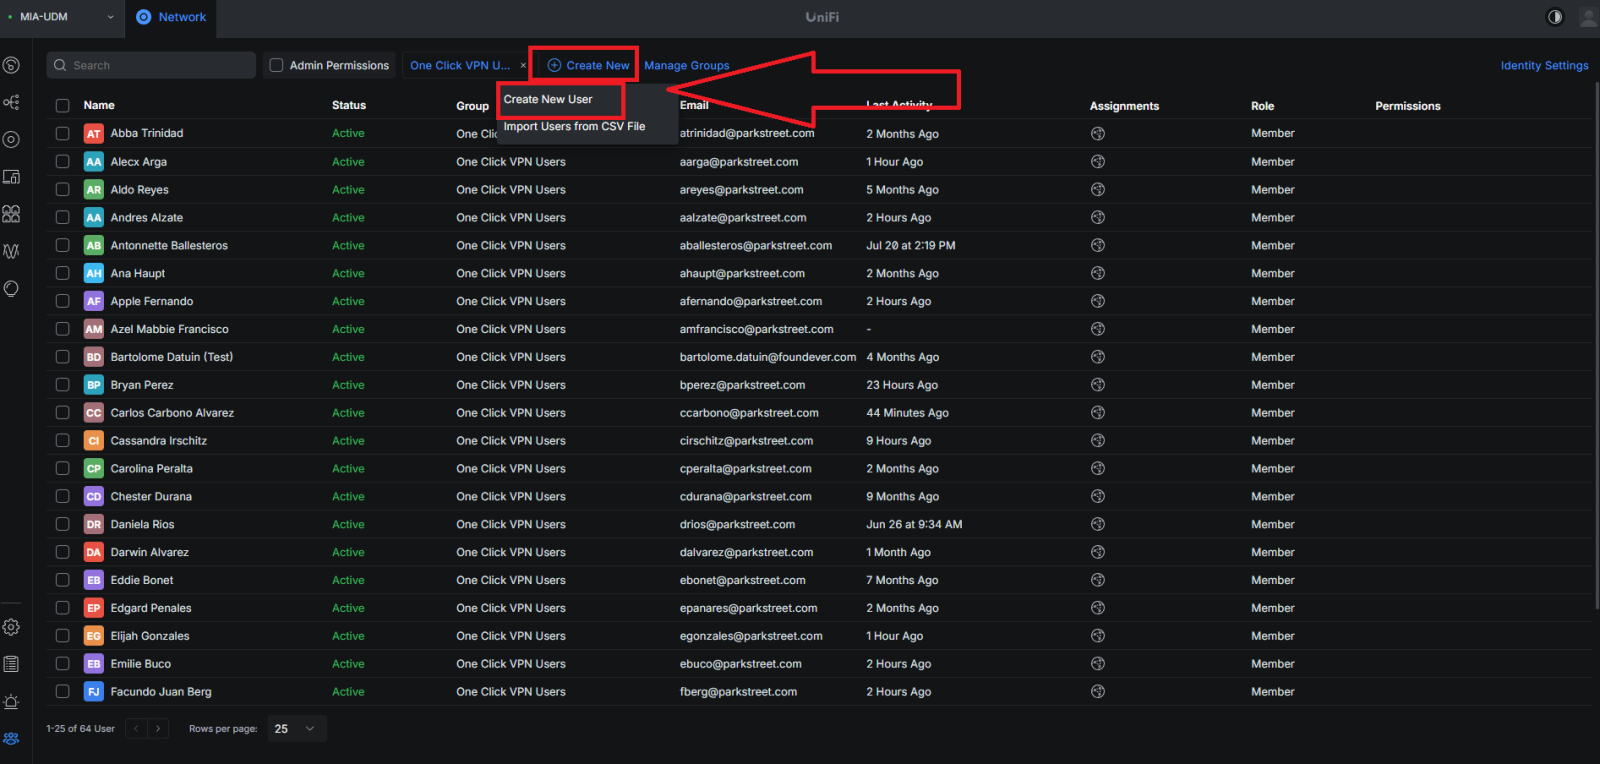
Step 2 — Create a New User
Click Create New, then select Create New User from the dropdown.
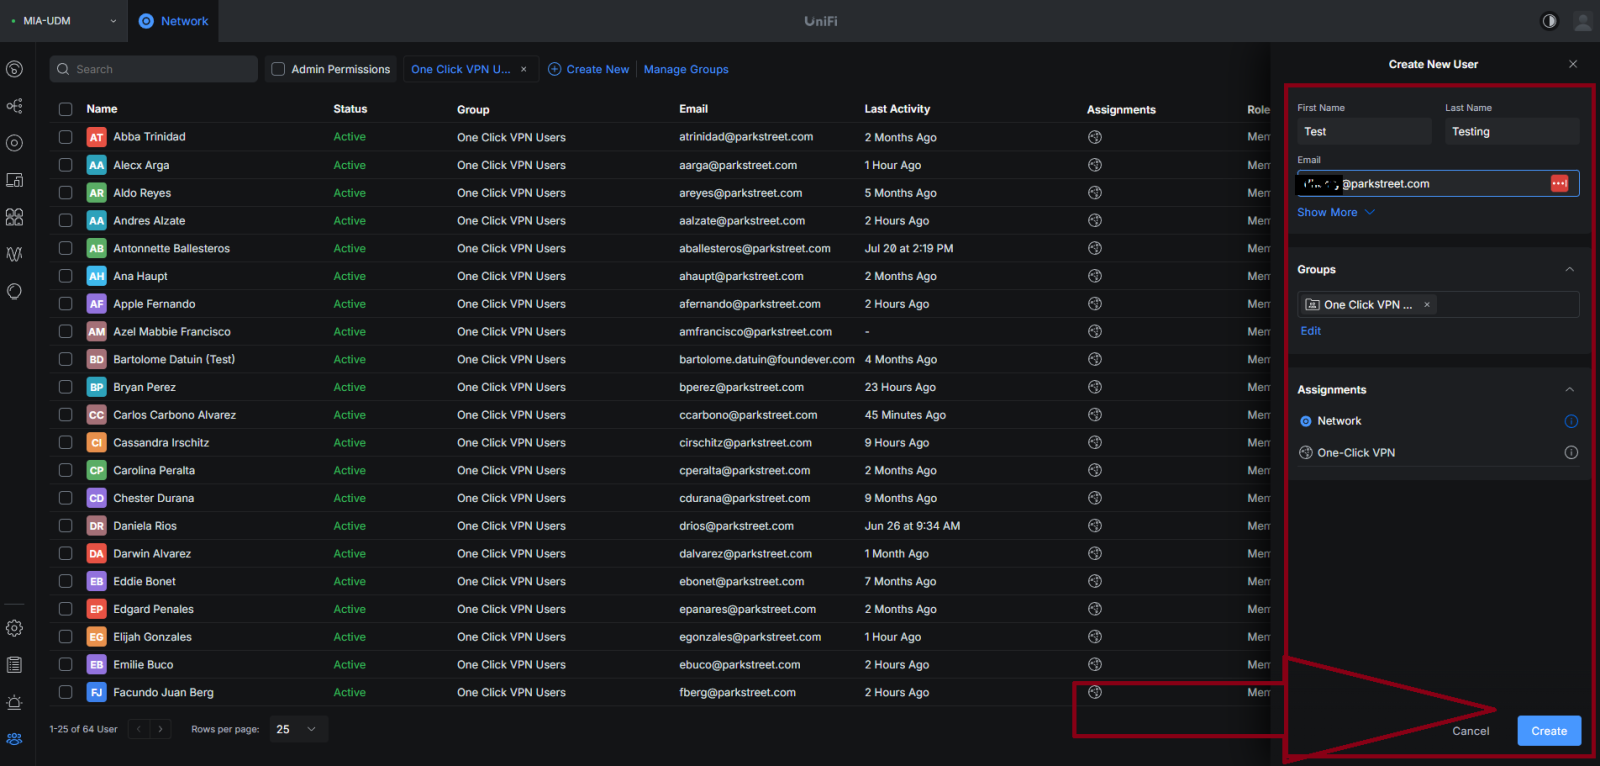
Step 3 — Fill in Employee Details and Assign VPN Access
Enter the employee's First Name, Last Name, and @parkstreet.com email. Under Groups, confirm "One Click VPN Users" is added, and under Assignments, confirm both Network and One-Click VPN are listed. Click Create.
💡 Once created, the employee automatically receives an invitation email from UniFi Identity.
Part 2: Employee Setup (End User Steps)
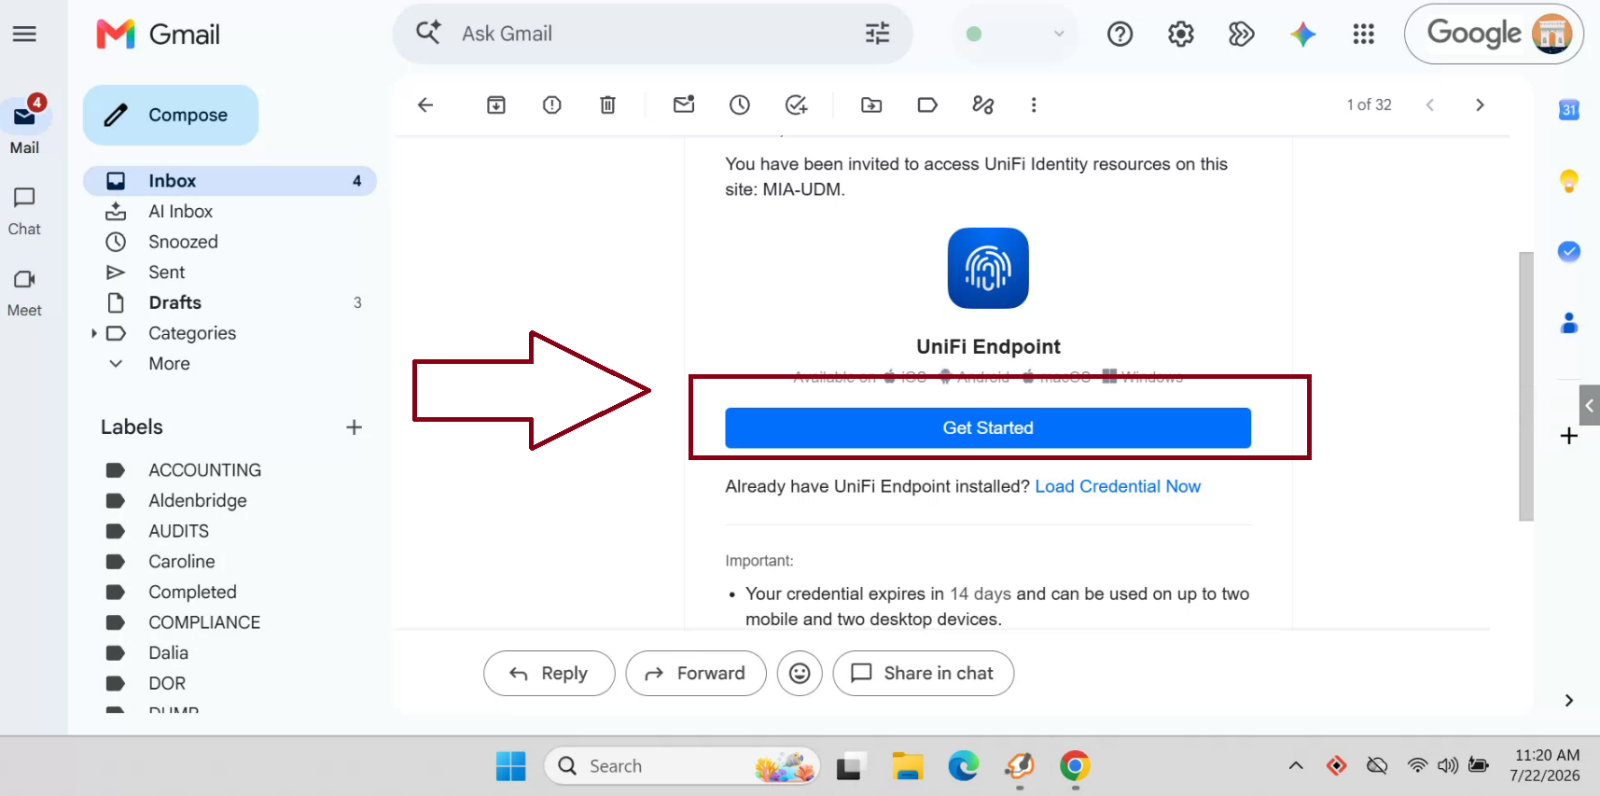
Step 4 — Open the Invitation Email
The employee opens the "Welcome to UniFi Identity" email in Gmail and clicks Get Started under UniFi Endpoint.
Step 5 — Download UniFi Endpoint
On the UniFi Identity setup page, under Set Up on This Computer, click download UniFi Endpoint if the download doesn't start automatically.

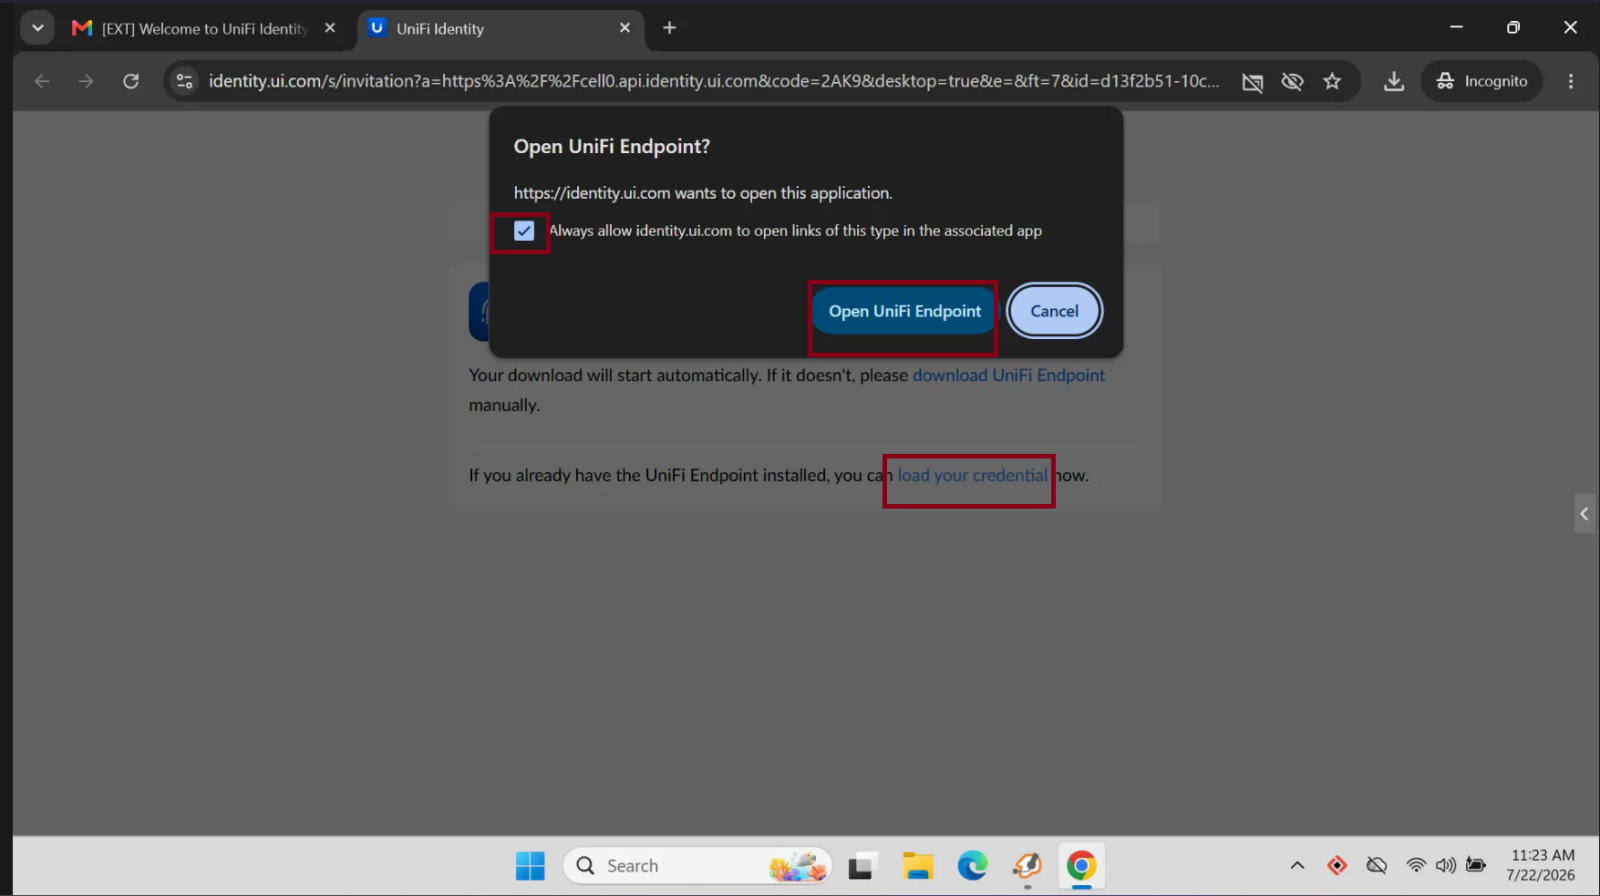
Step 6 — Load your credectials
When prompted, check "Always allow identity.ui.com to open links of this type" and click Open UniFi Endpoint.
Step 7 — Turn On VPN
In the UniFi Endpoint app, toggle VPN to On.

📌 Note: Park Street IT manages and controls all Park Street employee computers directly, so IT can install UniFi Endpoint and assist with setup on those devices at any time.
For employees working through contracted partner companies (e.g., Skys/Foundever, Cloudstaff, and Consumer Sketch), Park Street IT does not control those computers. Those employees should contact their own company's local IT/support team for help installing UniFi Endpoint and completing Steps 4–7 — Park Street IT is not responsible for software installs on non-Park Street–owned devices.