
Document Owner: IT Department
Last Updated: March 2026
Applies To: All Park Street Employees
Overview
Park Street is implementing Okta as an additional layer of security to manage access to your web applications. This means you will use Okta as a centralized, secure portal to access the tools you use every day — including Google Workspace, Slack, Front, TalentLMS, and more.
Important: Once Okta is fully activated for your department, your Okta password will also become your Google password. Keep this in mind throughout the setup process.
Step 1 — Activate Your Okta Account via Email
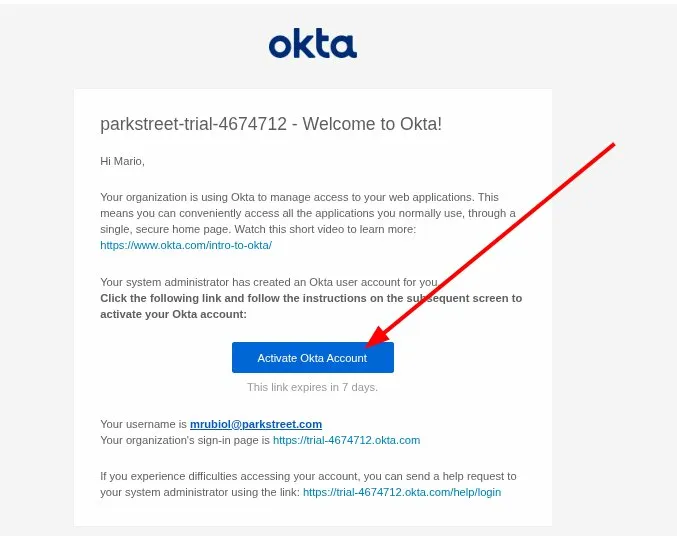
You will receive a welcome email from Okta in your corporate inbox with the subject line "Welcome to Okta!".
Open the email and click the "Activate Okta Account" button.
Note: The activation link expires in 7 days. If it expires before you activate, contact IT for a new invitation.
Step 2 — Set Up Your Password
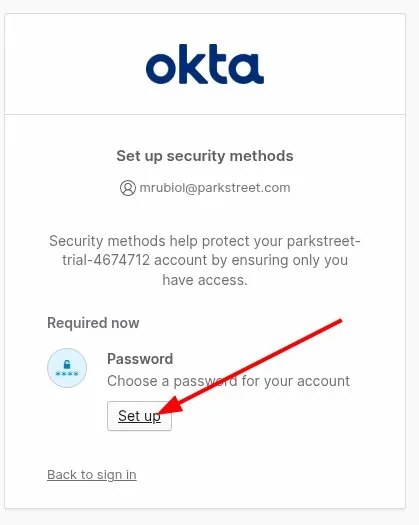
After clicking the activation link, you will be redirected to the Okta security setup page. The first required step is to create a password.
- Click "Set up" under the Password section.
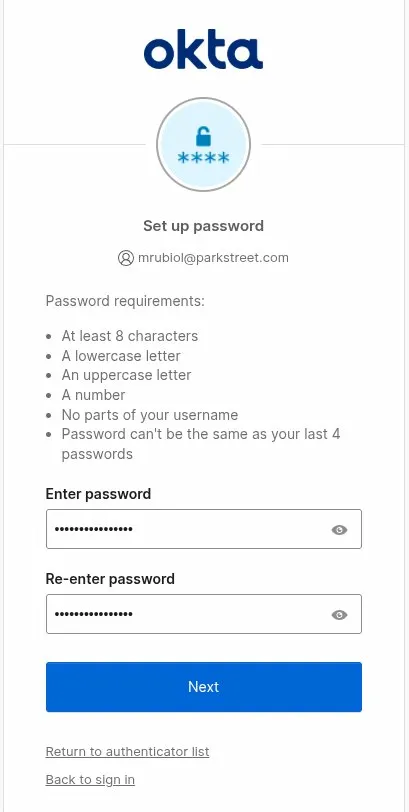
- Enter a password that meets the following requirements:
- At least 8 characters
- A lowercase letter
- An uppercase letter
- A number
- No parts of your username
- Cannot be the same as your last 4 passwords
- Enter and confirm your password, then click "Next".
Important Reminder: This new Okta password will become your Google password from this point forward.
Step 3 — Set Up Okta Verify (Choose One)
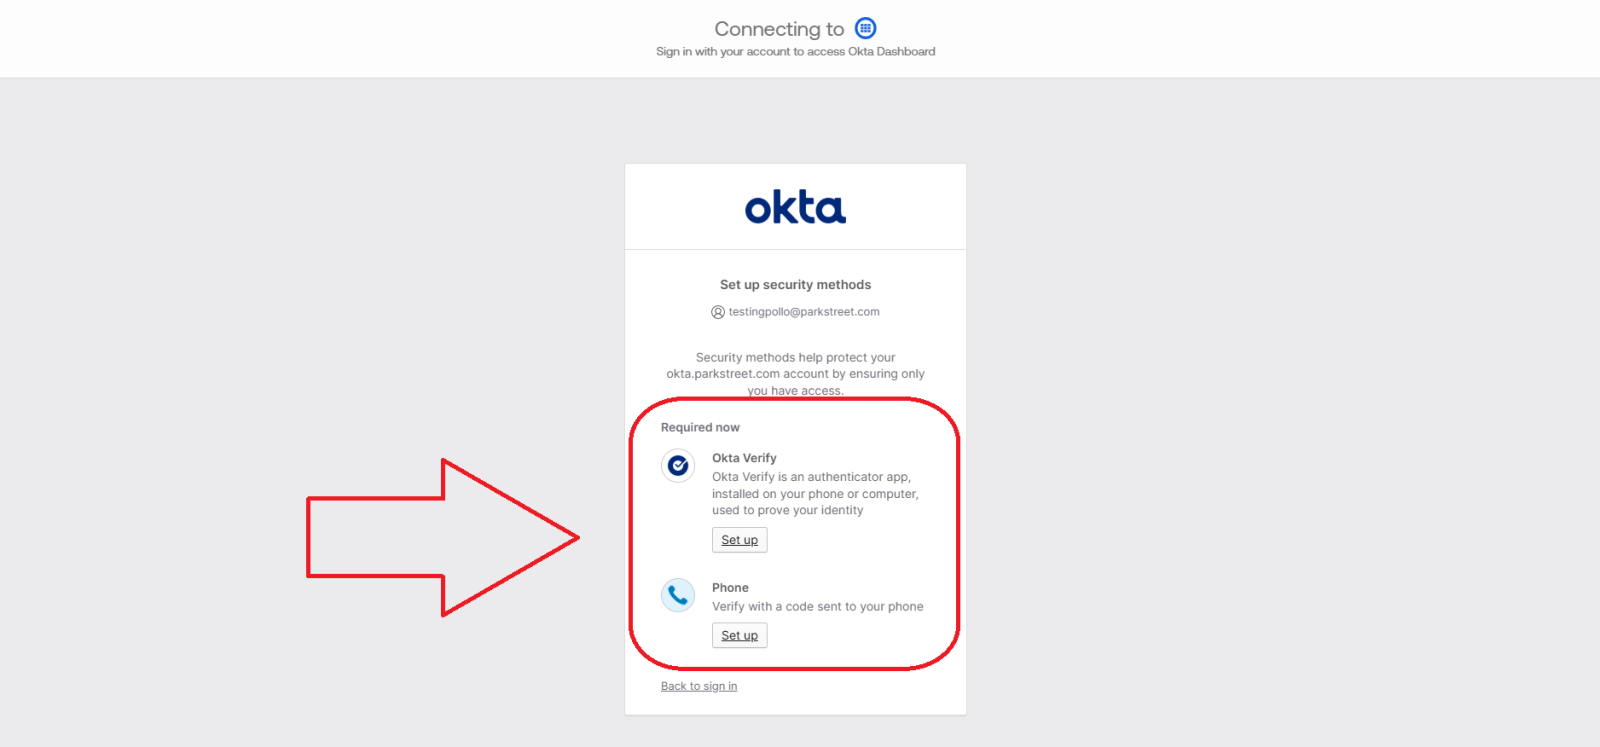
After setting your password, you will be required to set up Okta Verify, an authenticator app that provides time-based security codes for login verification.
Option A: Set Up Okta Verify App
Before proceeding, download the Okta Verify app on your mobile device:
- iOS (iPhone/iPad): Download from the App Store
- Android: Download from Google Play
Link Your Account
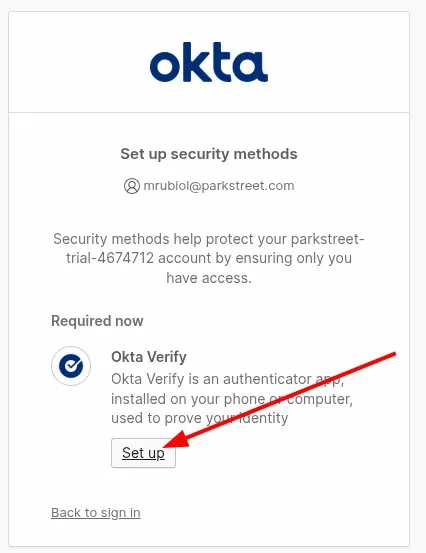
- On the Okta setup page, click "Set up" under Okta Verify.
- A QR code will appear on your screen.
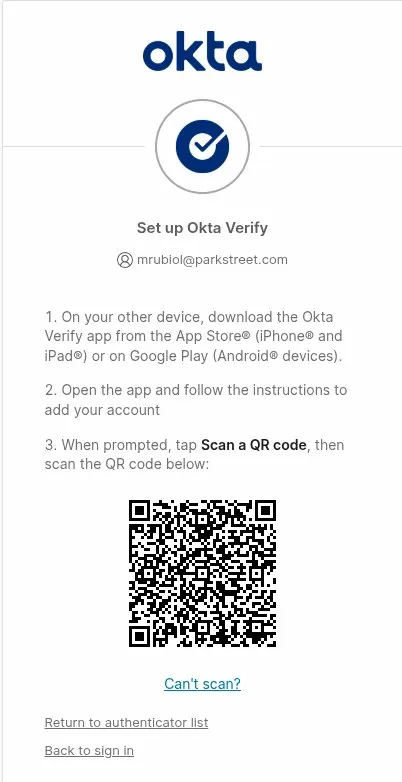
- Open the Okta Verify app on your phone, follow the in-app instructions to add your account, and when prompted, tap "Scan a QR code".
- Scan the QR code displayed on your computer screen.
Once scanned successfully, your account will be linked and you will be logged into Okta.
Option B: Set Up Phone (SMS/Text Code) If you prefer not to download the application, you can use your mobile phone number to receive a verification code via text message.
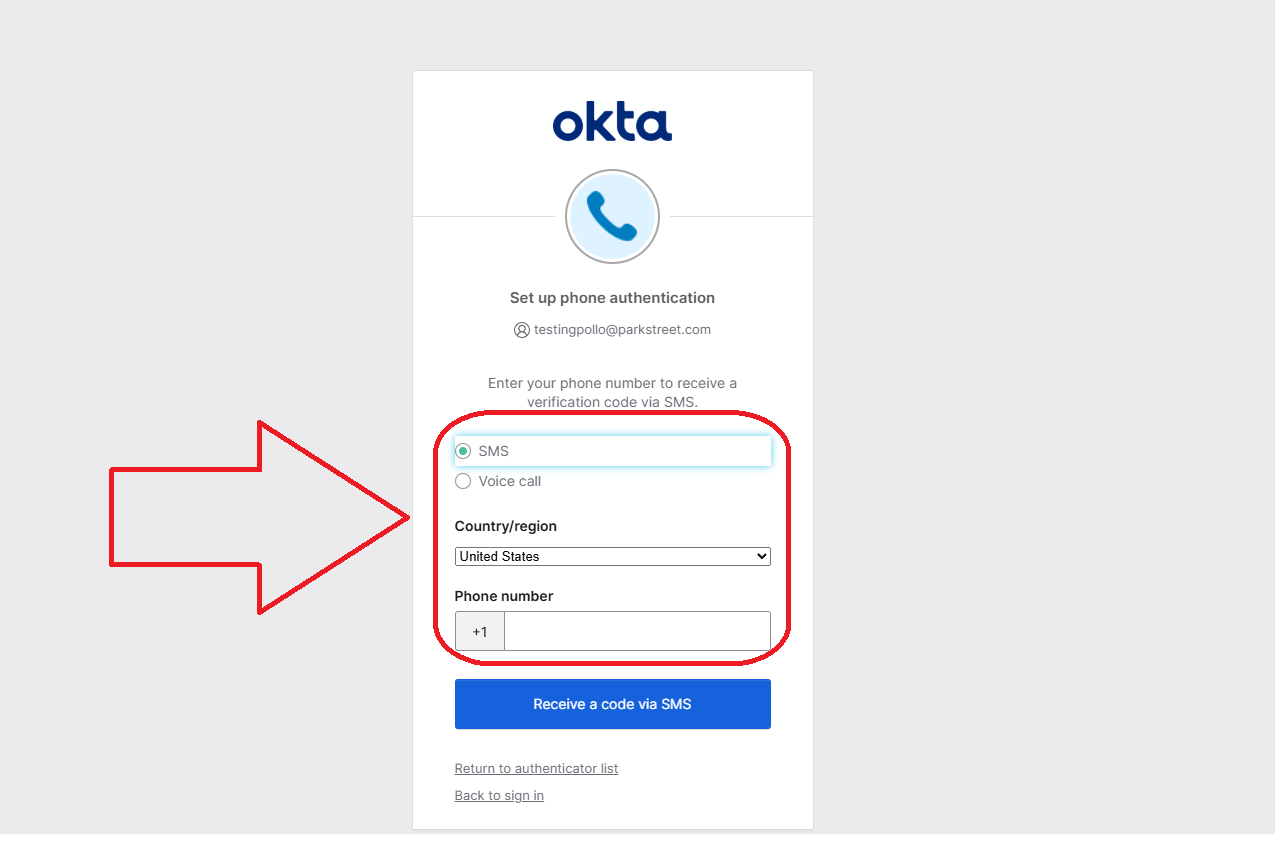
- On the setup page, click "Set up" under the Phone option.
- Select SMS, ensure the Country/region is correct, enter your phone number, and click "Receive a code via SMS".
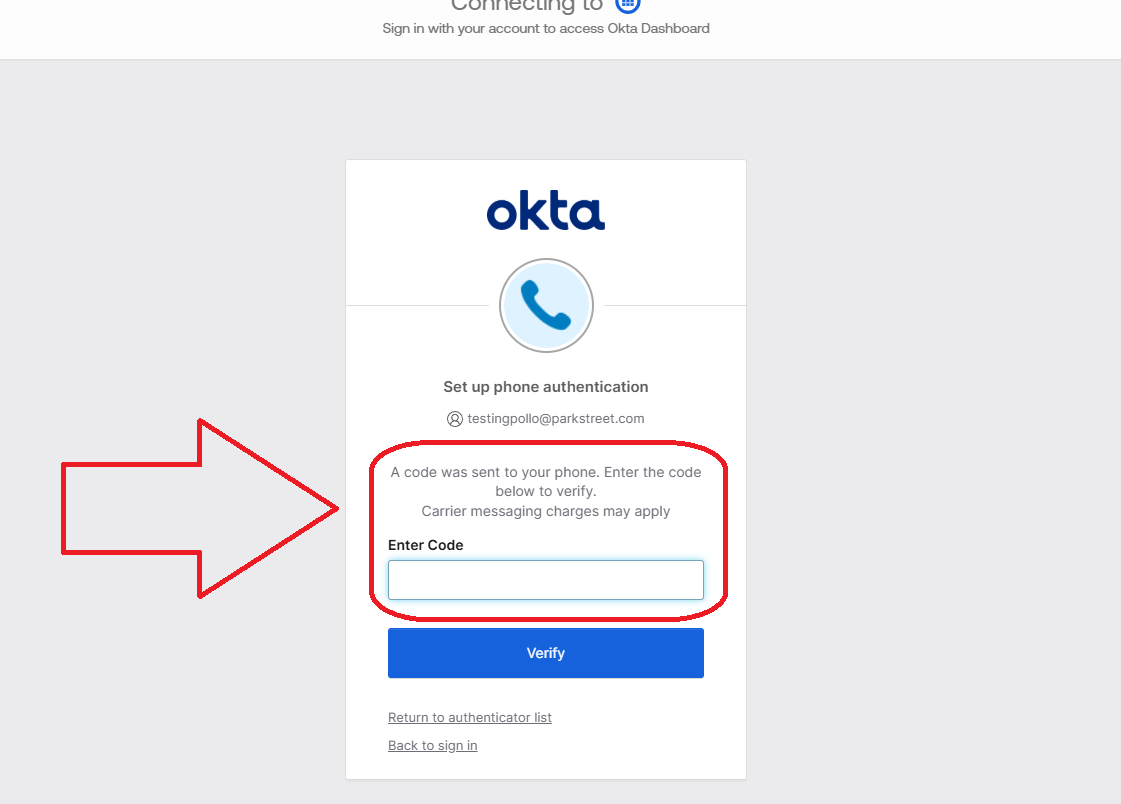
3-Check your phone for a text message from Okta. Enter the code on your computer screen and click "Verify".
4-You may be prompted to verify your identity with your password again. Enter it and click "Verify".
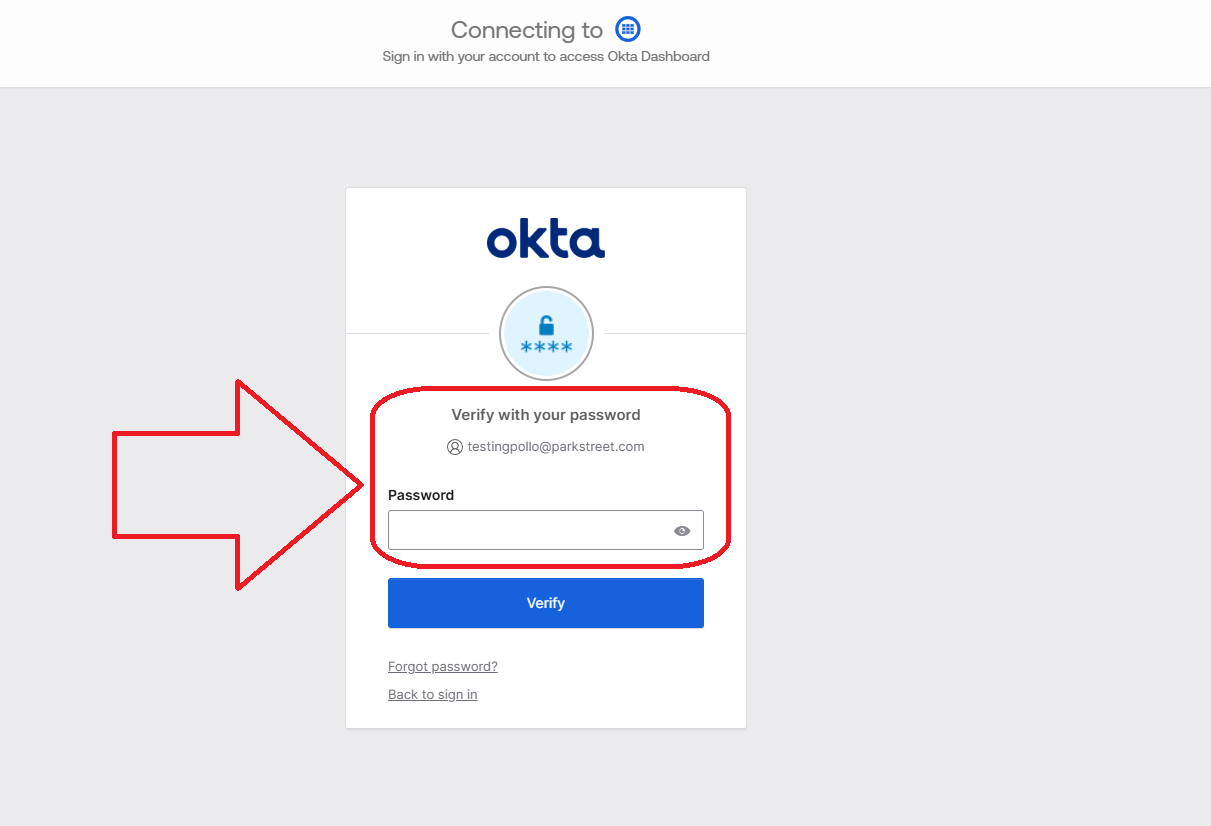
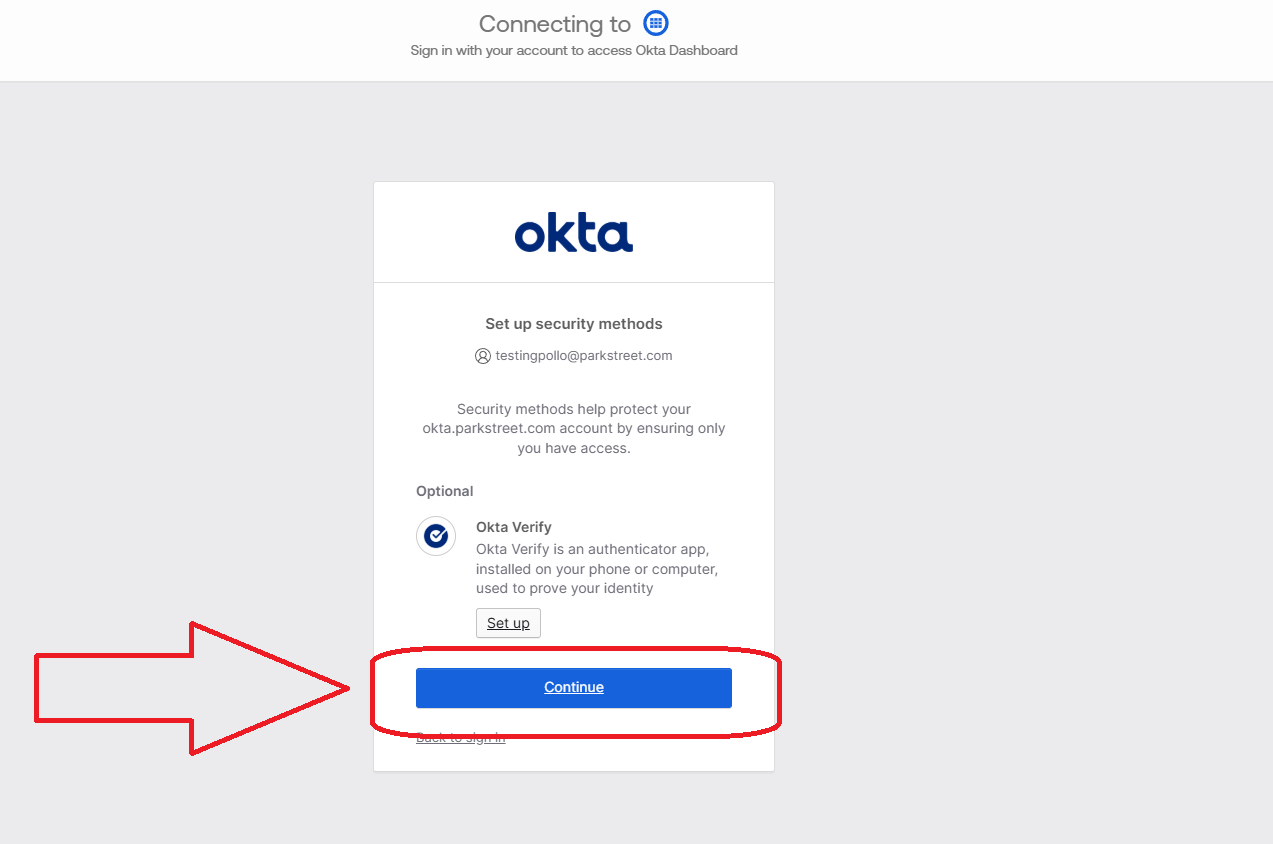
The next screen will show Okta Verify as "Optional". Simply click the blue "Continue" button at the bottom to proceed.
Step 4 — Explore Your Okta Dashboard
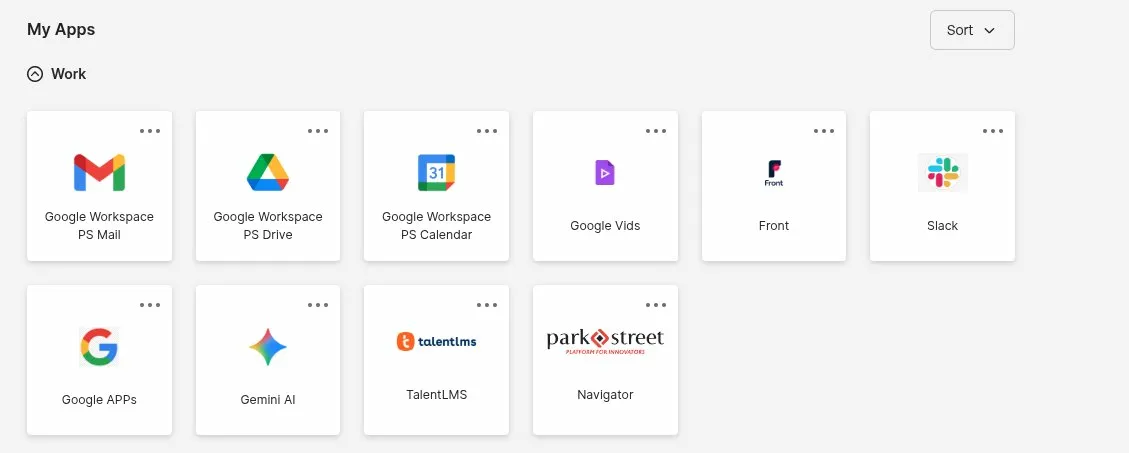
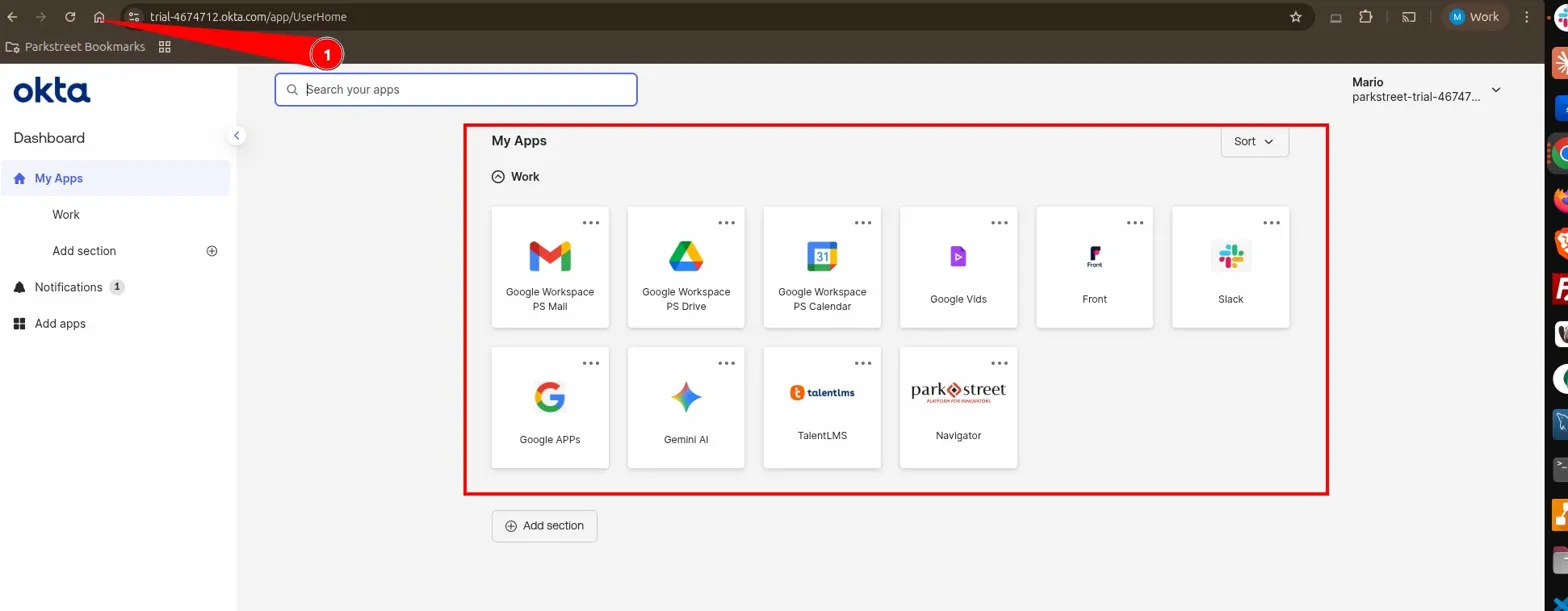
After completing setup, you will land on your Okta Dashboard (My Apps) page. Here you will see all the applications assigned to you based on your department, such as Google Workspace Mail, Drive, Calendar, Slack, Front, TalentLMS, Navigator, and others.
If any application you need is missing, please contact IT using:
⚠️ Important — Transition Period
Even after completing your Okta setup and seeing your apps on the Okta dashboard, do not use the apps from within Okta just yet.
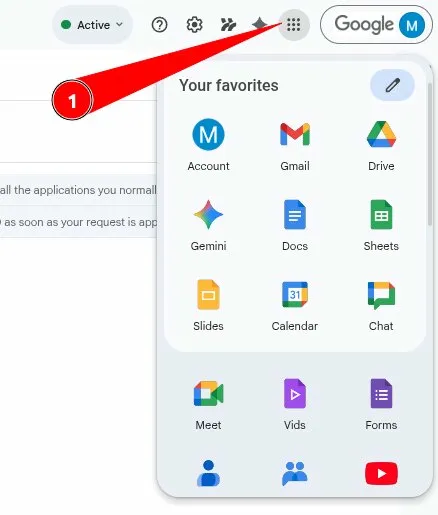
During the transition period, continue accessing your applications as you normally do, through Google Chrome and the Google Apps menu (the 9-dot grid icon in the top-right corner of your browser).
IT will wait until all employees in your department have activated their Okta accounts before enabling app access through Okta. You will be notified when this change takes effect.
Step 5 — Post-Activation: New Login Flow
Once IT has fully activated Okta for your department, the login experience will change as follows:
5.1 — Automatic Redirect to Okta
When you try to access your corporate email or any linked application, you will be automatically redirected to Okta's sign-in page.
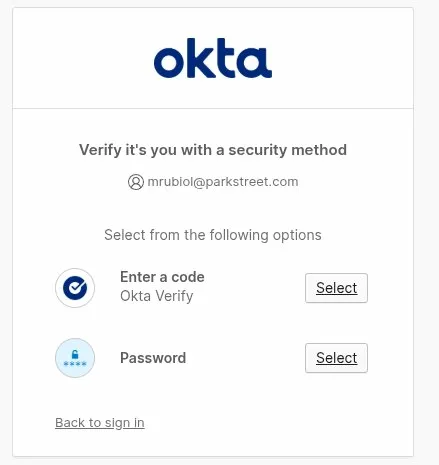
5.2 — Verify Your Identity
Select your preferred verification method:
- Enter a code — Using the Okta Verify app on your phone.
- Password — Using your Okta password.
5.3 — Confirm Your Account
Google will ask you to confirm that the account shown is yours. Click "Continue" to proceed.
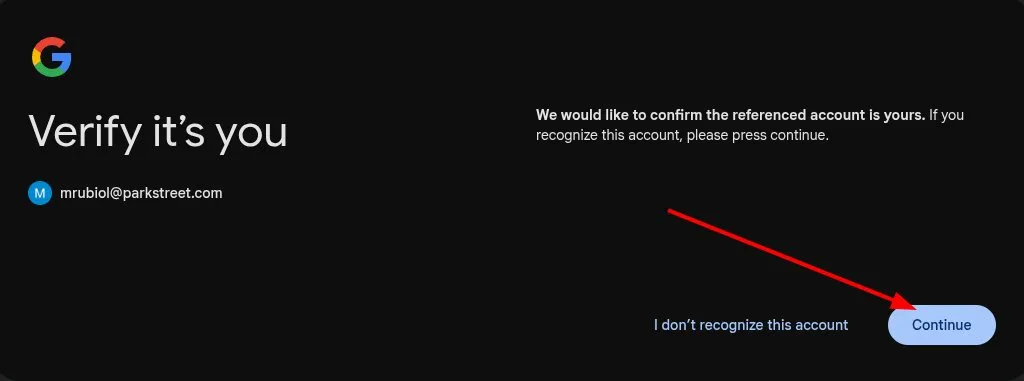
You will then be signed into your account.
When you go to the Google Chrome homepage, you will be redirected to the Okta homepage, where all your assigned department applications will be available for direct access.
Summary
| Phase | What to Do |
|---|---|
| Setup | Activate Okta via email → Set password → Set up Okta Verify |
| Transition Period | Continue using Google Apps menu as usual; do not launch apps from Okta yet |
| Post-Activation | Use Okta as your main login portal; apps will be accessible from your Okta dashboard |
Need Help?
If you experience any issues during setup or have questions about your assigned applications, reach out to the IT team: